Optimal Streaming Performance: 2026 Guide for Twitch & YouTube
Advertisements
To ensure peak streaming performance on Twitch and YouTube in 2026, meticulously configure your streaming software, optimize hardware, and understand bitrate, resolution, and encoding settings for a flawless viewer experience.
In the dynamic world of live content creation, mastering your setup is paramount. This guide focuses on configuring your streaming software for optimal game performance: a 2026 guide for Twitch and YouTube, ensuring your broadcasts are smooth, engaging, and professional. We’ll delve into the intricacies of software settings, hardware optimization, and network considerations to elevate your streaming quality to the next level.
Understanding the Streaming Ecosystem in 2026
The streaming landscape continues its rapid evolution, with advancements in hardware, software, and network infrastructure constantly reshaping what’s possible. As we move further into 2026, streamers face both exciting opportunities and new challenges in delivering high-quality content. Understanding this ecosystem is the first step towards optimizing your setup.
The core components of any successful stream remain consistent: your gaming PC, streaming software, and a robust internet connection. However, the demands placed on each of these components have intensified. Viewers expect higher resolutions, smoother frame rates, and crystal-clear audio. Meeting these expectations requires a nuanced approach to configuration and optimization.
The Role of Hardware and Software Synergy
Achieving optimal performance isn’t just about having powerful components; it’s about how well they work together. Your CPU, GPU, and RAM must be balanced to handle both the game you’re playing and the demanding task of encoding and uploading your stream. Similarly, your streaming software acts as the conductor, orchestrating these resources efficiently.
- CPU Power: Essential for game processing and software encoding, especially with x264.
- GPU Performance: Crucial for rendering games at high frame rates and often for hardware encoding (NVENC, AMF).
- RAM Capacity: Adequate memory prevents bottlenecks and ensures smooth multitasking between game and stream.
- Storage Speed: Fast SSDs reduce loading times for games and can impact overall system responsiveness.
The synergy between these elements is what ultimately dictates your stream’s quality and stability. Overlooking one aspect can lead to dropped frames, stuttering, or an overall poor viewer experience. Our goal is to create a harmonious system where every component contributes to a flawless broadcast.
Choosing and Configuring Your Streaming Software
Selecting the right streaming software is foundational to your success. While many options exist, OBS Studio and Streamlabs Desktop remain the dominant players in 2026 due to their versatility, community support, and continuous development. Each offers a comprehensive suite of tools for capturing, encoding, and broadcasting your content.
Once you’ve chosen your software, the real work begins: configuration. This involves a deep dive into settings that directly impact your stream’s visual quality, performance, and stability. The goal is to strike a balance between a high-quality output and maintaining acceptable in-game performance.
OBS Studio: A Deep Dive into Settings
OBS Studio is renowned for its flexibility and efficiency. For optimal game performance, pay close attention to the ‘Output’ and ‘Video’ settings.
- Encoder: For most modern systems, hardware encoders like NVIDIA NVENC (new) or AMD AMF are highly recommended. They offload the encoding task from your CPU to your GPU, significantly reducing CPU usage and improving game performance. If you have an older system or a very powerful CPU, x264 (CPU-based) can offer superior visual quality at the cost of higher CPU utilization.
- Rate Control: CBR (Constant Bitrate) is the standard for live streaming, ensuring a consistent bitrate for stable network performance.
- Bitrate: This is arguably the most critical setting. A higher bitrate generally means better visual quality but requires more upload bandwidth. For 1080p60 streaming, 4500-6000 kbps is a good starting point. For 720p60, 2500-4000 kbps is often sufficient. Always test your internet’s upload speed to determine your maximum stable bitrate.
- Keyframe Interval: Set this to 2 seconds for both Twitch and YouTube.
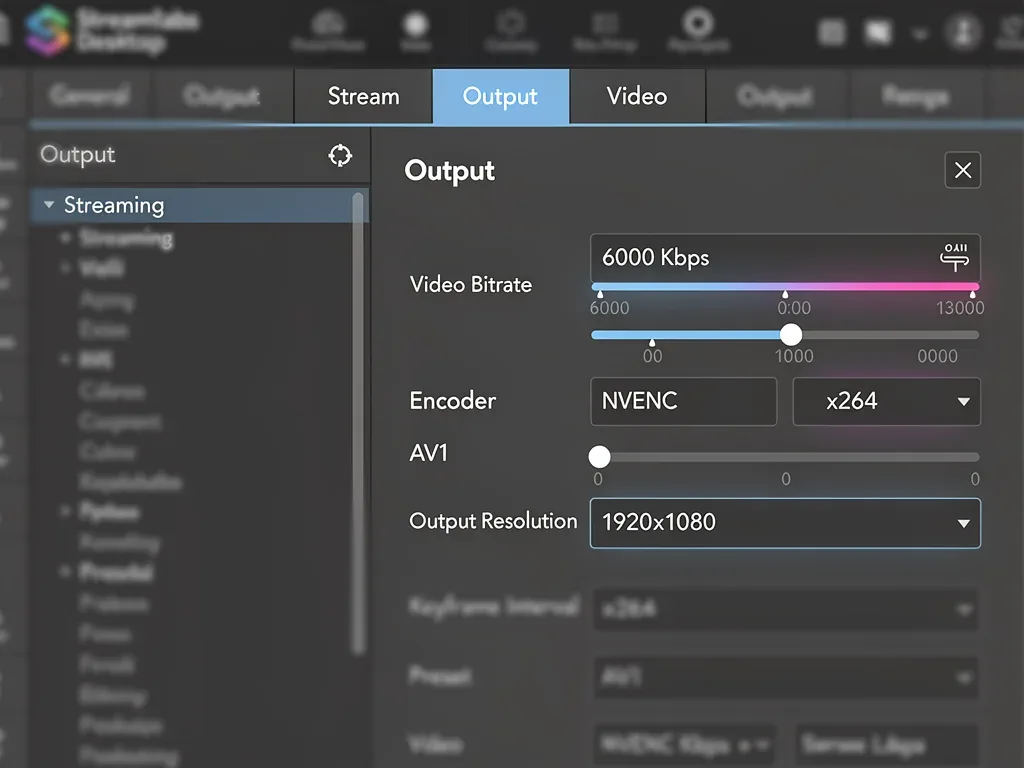
In the ‘Video’ section, ensure your ‘Base (Canvas) Resolution’ matches your monitor’s resolution, and your ‘Output (Scaled) Resolution’ is set to your desired stream resolution (e.g., 1920×1080 or 1280×720). The ‘Downscale Filter’ should be Lanczos for sharper scaling, or Bicubic if Lanczos causes performance issues. Set ‘Common FPS Values’ to 60 or 30, depending on your target frame rate.
Streamlabs Desktop: Streamlining Your Setup
Streamlabs Desktop, built on OBS Studio, offers a more user-friendly interface with integrated alerts and widgets. Its core settings for performance mirror OBS Studio’s, but the auto-optimization feature can be a helpful starting point.
- Auto-Optimizer: This tool attempts to configure your settings based on your hardware and internet speed. While a good starting point, manual adjustments are almost always necessary for optimal results.
- Game Capture: Use ‘Game Capture’ sources over ‘Display Capture’ or ‘Window Capture’ whenever possible. Game Capture is more efficient and less resource-intensive, directly hooking into the game’s rendering process.
- Scene Optimization: Minimize the number of active sources and animations in your scenes. Each source consumes resources, even if not visible. Grouping and disabling unused sources can significantly improve performance.
Regardless of your chosen software, consistent testing is key. Stream to a private channel or use a local recording to evaluate your settings before going live to your audience. This iterative process allows you to fine-tune your setup for the best possible experience.
Optimizing In-Game Settings for Streaming
Your in-game settings play a crucial role in overall stream performance. A game running at max settings might look fantastic locally, but it can starve your streaming software of the necessary resources, leading to dropped frames or stuttering on your broadcast. The objective is to find a sweet spot where the game looks good, runs smoothly, and leaves enough headroom for your encoder.
Prioritize frame rate stability over graphical fidelity. A consistent 60 frames per second (FPS) in your game is often more important for a smooth stream than ultra-high textures or complex shadows. Many professional streamers opt for slightly reduced in-game settings to ensure a flawless broadcast, even with top-tier hardware.
Key In-Game Adjustments
- Resolution: Match your in-game resolution to your base canvas resolution in your streaming software. If you’re streaming at 1080p, playing at 1440p locally and downscaling can be taxing on your GPU.
- Frame Rate Cap: Consider capping your in-game frame rate slightly above your stream’s target FPS (e.g., 75-90 FPS for a 60 FPS stream). This prevents your GPU from working at 100% constantly, leaving some processing power for encoding.
- Graphics Presets: Start with a medium-high preset and gradually increase individual settings until you notice a performance drop in your stream or game.
- Specific Settings:
- Shadows: Often one of the most demanding settings. Reducing shadow quality can yield significant performance gains.
- Anti-aliasing: Can be very resource-intensive. Experiment with lower settings or different anti-aliasing methods.
- View Distance/Draw Distance: Reducing these can help, especially in open-world games.
- Post-processing Effects: Bloom, motion blur, depth of field can be disabled or reduced to save resources.
Remember that every game is different, and what works for one might not work for another. Spend time testing various combinations of in-game settings alongside your streaming software to find the optimal configuration for each title you play. Tools like NVIDIA’s GeForce Experience or AMD’s Radeon Software can offer game-specific optimizations, but always double-check and fine-tune them for streaming purposes.
Advanced Encoding and Bitrate Strategies
Beyond the basic settings, understanding advanced encoding parameters and bitrate strategies can significantly enhance your stream quality and stability. In 2026, with improved internet infrastructures and more powerful hardware, streamers have greater control over their broadcast’s technical fidelity. This section explores how to push the boundaries of your stream’s visual presentation without compromising performance.
The choice between hardware (NVENC, AMF) and software (x264) encoding remains a critical decision. While hardware encoders offer excellent performance-to-quality ratios, x264 can still provide superior visual quality, especially at lower bitrates, if your CPU can handle the load. Modern hardware encoders, however, have closed much of this gap.
Fine-Tuning Your Encoder Settings
- NVENC (NVIDIA): For NVIDIA GPUs, the ‘New’ NVENC encoder is highly efficient.
- Preset: ‘Quality’ or ‘Max Quality’ are ideal. If performance is an issue, try ‘Performance’.
- Profile: ‘High’ is generally recommended.
- Look-ahead & Psycho Visual Tuning: Enabling these can improve visual quality at the cost of a slight performance hit. Test to see if your system can handle it.
- AMF (AMD): AMD’s encoder has also seen significant improvements.
- Preset: Experiment with ‘Quality’ or ‘Balanced’.
- Rate Control Method: CBR or CQP (Constant Quantization Parameter) can be used, with CQP offering more consistent quality but potentially higher variable bitrates.
- x264 (CPU): If using x264, the ‘CPU Usage Preset’ is key.
- Preset: ‘Veryfast’ is a common starting point. Moving to ‘faster’ or ‘fast’ will increase CPU usage but improve quality. Avoid ‘medium’ or slower unless you have a high-core count CPU dedicated solely to encoding.
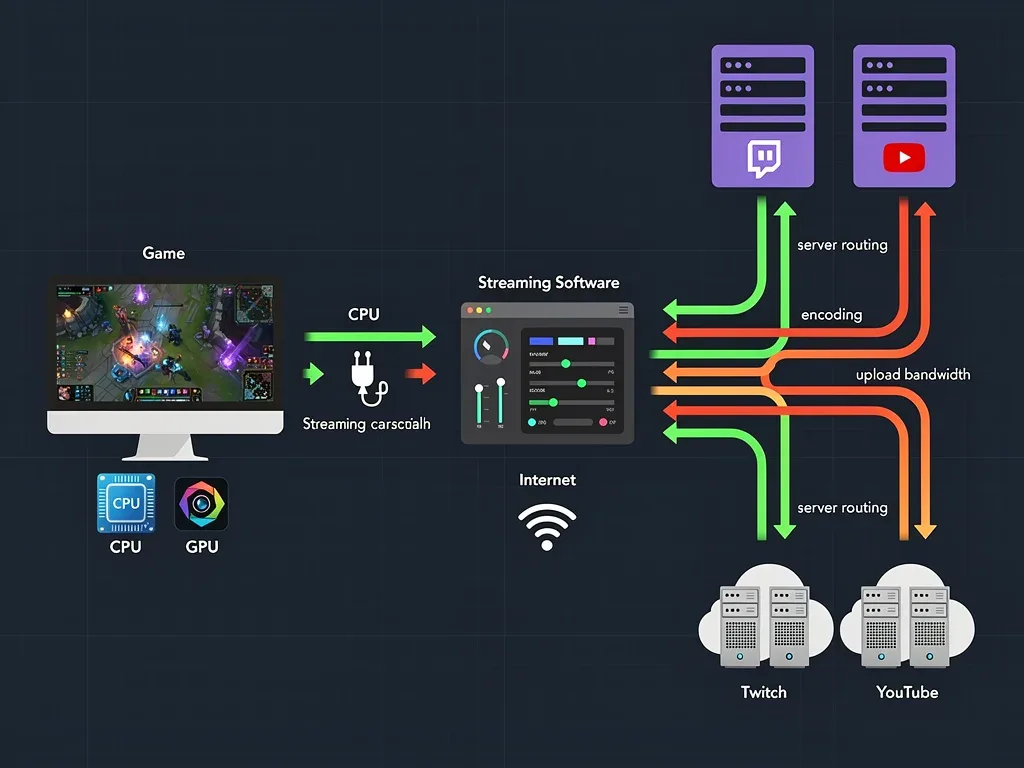
Bitrate management is also crucial. While a higher bitrate is generally better, there’s a point of diminishing returns, and exceeding your ISP’s upload capacity or the platform’s limits will lead to dropped frames. Always monitor your ‘Skipped Frames’ and ‘Dropped Frames’ statistics in your streaming software to identify network or encoding issues.
Consider using dynamic bitrate if your internet connection is unstable, though most platforms prefer CBR for consistency. For YouTube, higher bitrates are generally more forgiving due to their more robust infrastructure, while Twitch has stricter guidelines.
Network Optimization and Internet Connectivity
Even with perfectly configured software and optimized in-game settings, a poor internet connection can derail your entire stream. Network stability and sufficient upload bandwidth are non-negotiable for a high-quality broadcast. In 2026, fiber optic internet is becoming more widespread, offering symmetric upload and download speeds, which is a game-changer for streamers.
Beyond raw speed, network latency and packet loss are critical factors. High latency can cause delays between your actions and what your viewers see, while packet loss leads to dropped frames and a choppy stream. Regularly testing your internet connection, especially your upload speed and latency to streaming servers, is essential.
Ensuring a Stable Connection
- Wired Connection: Always use an Ethernet cable instead of Wi-Fi for your streaming PC. Wi-Fi is prone to interference, latency spikes, and inconsistent speeds.
- Prioritize Bandwidth: Configure your router’s Quality of Service (QoS) settings to prioritize your streaming PC and the streaming software’s traffic. This ensures your stream gets the necessary bandwidth even when other devices are using the network.
- Close Unnecessary Applications: Ensure no other applications are consuming significant upload bandwidth in the background (e.g., cloud backups, large downloads, other streaming services).
- Choose the Right Server: In your streaming software, select the ingest server closest to your physical location. This minimizes latency and improves connection stability to Twitch or YouTube.
- Monitor Network Health: Use tools like PingPlotter or your router’s diagnostics to identify potential network issues, such as packet loss or intermittent disconnections.
If your internet speed is a limiting factor, consider lowering your stream’s resolution or frame rate to reduce the required bitrate. A stable 720p stream is far superior to a stuttering 1080p stream. Invest in the best internet plan you can afford, especially one with high upload speeds, as this is the backbone of your streaming operation.
Audio Configuration and Quality
While visual quality often takes center stage, audio is equally, if not more, important for viewer engagement. A stream with excellent video but poor audio can be frustrating to watch, leading to viewers leaving. In 2026, high-fidelity audio is an expectation, not a luxury. This means investing in a good microphone and meticulously configuring your audio settings.
Your microphone is your voice to the audience. Whether it’s a dedicated XLR microphone with an audio interface or a high-quality USB microphone, ensuring clear, crisp sound is paramount. Beyond the hardware, software configuration plays a vital role in eliminating background noise and optimizing your voice.
Optimizing Your Audio Chain
- Microphone Selection: Choose a microphone suitable for your environment. Condenser mics are great for quiet spaces, while dynamic mics are better at rejecting background noise.
- Gain Staging: Adjust your microphone’s gain (input volume) so your voice is clear and loud without peaking (clipping). Aim for your audio meter to hit the yellow zone, rarely touching red.
- Noise Suppression: Use software filters like ‘Noise Suppression’ (RNNoise is highly effective in OBS Studio) to reduce ambient background noise. Be careful not to overdo it, as it can make your voice sound artificial.
- Noise Gate: A noise gate mutes your microphone when your voice falls below a certain threshold, effectively silencing keyboard clicks, mouse movements, or room hum when you’re not speaking.
- Compressor: A compressor helps to even out your audio levels, making quiet parts louder and loud parts softer, resulting in a more consistent and professional sound.
- Equalizer: An equalizer can be used to sculpt your voice, making it sound richer or clearer, depending on your microphone and voice characteristics.
Always monitor your audio in your streaming software before going live. Listen back to recordings to catch any issues you might miss during live monitoring. Good audio isn’t just about sounding professional; it’s about making your content accessible and enjoyable for everyone.
Maintaining and Troubleshooting Your Stream Setup
Even with an optimally configured setup, issues can arise. Regular maintenance and a systematic approach to troubleshooting are crucial for minimizing downtime and ensuring a consistently high-quality stream. The streaming landscape is constantly evolving, with game updates, software patches, and driver releases potentially impacting your performance.
Proactive maintenance can prevent many common problems. This includes keeping your operating system, drivers, and streaming software up to date. When issues do occur, having a methodical troubleshooting process can save you significant time and frustration.
Best Practices for Maintenance and Troubleshooting
- Keep Drivers Updated: Regularly update your GPU drivers, audio drivers, and chipset drivers. New drivers often include performance optimizations for games and streaming applications.
- Update Streaming Software: Stay on the latest stable version of OBS Studio or Streamlabs Desktop. Developers frequently release updates with bug fixes, performance improvements, and new features.
- Monitor Performance: Utilize the performance statistics available in your streaming software (e.g., CPU usage, GPU usage, dropped frames). These metrics are invaluable for identifying the root cause of performance issues.
- Test New Games/Settings: Before streaming a new game or making significant changes to your settings, do a test stream or local recording. This allows you to catch and resolve issues before a live audience sees them.
- Check Internet Speed Regularly: Perform speed tests before each stream to ensure your upload bandwidth is consistent and sufficient.
- Isolate the Problem: If you encounter an issue, try to isolate it. Is it only happening with one game? Does it occur when you’re not streaming? Is it a hardware or software issue?
- Consult Community Resources: The OBS Studio and Streamlabs communities are vast and helpful. Forums, Discord servers, and online guides can often provide solutions to common problems.
By adopting a routine of maintenance and troubleshooting, you can ensure your streaming setup remains robust and reliable, providing your audience with the best possible viewing experience. Staying informed about new technologies and best practices will keep you ahead in the competitive world of live streaming.
| Key Aspect | Brief Description |
|---|---|
| Encoder Choice | Hardware encoders (NVENC/AMF) offload CPU, improving game FPS. x264 (CPU) offers quality but demands more CPU. |
| Bitrate Management | Crucial for visual quality vs. upload speed. CBR recommended for stability. Test to avoid dropped frames. |
| In-Game Settings | Prioritize stable FPS over max graphics. Reduce demanding settings like shadows and anti-aliasing for encoder headroom. |
| Network Stability | Always use a wired connection. Prioritize stream traffic with QoS. Monitor upload speed and server latency. |
Frequently Asked Questions About Streaming Performance
What is the ideal bitrate for 1080p60 streaming in 2026?▼For 1080p60 streaming on Twitch and YouTube in 2026, a bitrate between 4500-6000 kbps is generally recommended for good visual quality. However, always test your internet’s upload speed and platform limits to find the highest stable bitrate your connection can handle without dropping frames.
Should I use a hardware (NVENC/AMF) or software (x264) encoder?▼In 2026, hardware encoders like NVENC (NVIDIA) and AMF (AMD) are highly recommended for most streamers. They offer excellent quality with minimal impact on game performance by offloading encoding from your CPU to your GPU. Use x264 only if you have a very powerful CPU and prioritize absolute maximum quality over in-game FPS.
How do I prevent dropped frames during my stream?▼Dropped frames often indicate network instability or an overloaded encoder. Ensure you’re using a wired internet connection, check your upload speed, and select the closest ingest server. If the encoder is overloaded, reduce your bitrate, lower your stream resolution/FPS, or adjust your in-game graphics settings to free up resources.
What in-game settings should I prioritize for optimal streaming performance?▼Prioritize stable frame rates over maximum graphical fidelity. Reduce demanding settings like shadows, anti-aliasing, and post-processing effects first. Cap your in-game FPS slightly above your stream’s target FPS to provide headroom for your encoder, ensuring a smoother broadcast.
Are there any specific audio settings for better stream quality?▼Yes, good audio is crucial. Use a quality microphone and adjust its gain properly. Implement noise suppression to reduce background sounds and a noise gate to mute your mic when you’re not speaking. A compressor can help normalize your vocal levels for a professional, consistent sound.
Conclusion
The journey to achieving optimal streaming performance on platforms like Twitch and YouTube in 2026 is a continuous process of learning, adjusting, and refining. By meticulously configuring your streaming software, optimizing your in-game settings, ensuring a robust network connection, and perfecting your audio, you lay the groundwork for a truly professional and engaging broadcast. Remember, the goal is not just to stream, but to deliver an experience that captivates your audience, making them return for more. Stay updated with the latest advancements, experiment with new settings, and always prioritize stability and viewer experience to stand out in the ever-growing world of live content.