Recap Sega Game Gear: 45-Minute Ceramic Capacitor Upgrade
Advertisements
Replacing electrolytic capacitors with ceramic alternatives in your Sega Game Gear can restore its functionality and extend its life, often achievable in under 45 minutes with the right tools and technique.
Are you ready to breathe new life into your cherished handheld console? Learning How to Recap Your Sega Game Gear in Under 45 Minutes Using Modern Ceramic Capacitors is not just a repair; it's a revival, bringing crisp audio and vibrant visuals back to your retro gaming experience.
The Enduring Legacy of the Sega Game Gear and Capacitor Failure
The Sega Game Gear, a technological marvel of its era, brought vibrant color and portable gaming to a generation. However, its Achilles' heel has always been its reliance on electrolytic capacitors, which, over time, inevitably fail. This degradation manifests as a host of common issues: dim screens, fuzzy audio, or even a complete refusal to power on. Understanding why these components fail is the first step toward appreciating the modern solution ceramic capacitors offer. Electrolytic capacitors contain a liquid electrolyte that can dry out, leak, or corrode, leading to a loss of capacitance and erratic behavior. This is a well-documented flaw across many vintage electronics, making recapping a crucial maintenance step for any serious retro gaming enthusiast.
The original design choices, while standard for the time, did not account for the long-term stability required for decades of use. As these consoles age, the symptoms become more pronounced, often rendering them unplayable. Many enthusiasts mistakenly believe their Game Gear is beyond repair, leading to a stockpile of non-functional units. However, the relatively simple act of replacing these faulty components can completely reverse these issues, restoring the console to its former glory. The process, while requiring precision, is highly rewarding and significantly extends the lifespan of these classic devices.
By addressing the root cause of these common failures, we not only fix the immediate problems but also prevent future issues that arise from aging components. This proactive approach ensures that your Sega Game Gear remains a playable piece of history for years to come. The satisfaction of bringing a dead console back to life is immense, and it’s a skill that empowers owners to maintain their collections independently. The shift towards ceramic capacitors offers a more permanent and reliable fix, moving beyond the inherent limitations of the original electrolytic components.
Why Modern Ceramic Capacitors are the Superior Choice
When it comes to recapping vintage electronics like the Sega Game Gear, the choice of replacement components is critical. Modern ceramic capacitors offer significant advantages over their electrolytic counterparts, making them the preferred choice for a lasting repair. Unlike electrolytic capacitors, ceramic capacitors do not contain liquid electrolytes, eliminating the risk of leakage, drying out, or corrosion. This inherent design difference contributes to their superior longevity and stability, ensuring your Game Gear remains functional for many more years than with traditional replacements.
Benefits of Ceramic Capacitors
- Extended Lifespan: Ceramic capacitors are solid-state, meaning they do not degrade over time in the same way electrolytic capacitors do. This translates to a significantly longer operational life for your console.
- Improved Stability: They exhibit stable performance across a wider temperature range and are less susceptible to changes in capacitance due to environmental factors.
- Compact Size: Often smaller than equivalent electrolytic capacitors, ceramic capacitors can be easier to fit into the cramped spaces within the Game Gear's circuit board.
- Enhanced Performance: By providing more stable power delivery and filtering, ceramic capacitors can contribute to clearer audio and more consistent video output, eliminating many common visual and auditory artifacts.

The transition to ceramic capacitors is not merely a repair; it is an upgrade. This modern approach to recapping ensures that the issues caused by component degradation are permanently addressed, rather than simply delaying their return. The initial investment in higher-quality components pays dividends in the long-term reliability and enjoyment of your retro console. Furthermore, the smaller form factor often simplifies the soldering process, particularly in tight areas of the PCB, making the job more manageable for those with less experience.
Embracing ceramic capacitors for your Game Gear recap project means investing in the future of your retro gaming. This choice reflects a commitment to quality and longevity, ensuring that your console will continue to provide entertainment for generations. The peace of mind that comes with knowing your console is equipped with robust, reliable components is invaluable. It transforms a common maintenance task into a definitive enhancement, pushing the boundaries of what is possible with vintage electronics restoration.
Essential Tools and Materials for a Successful Recap
Before embarking on the Game Gear recapping journey, gathering the right tools and materials is paramount. Having everything organized and ready will streamline the process and minimize frustration, ensuring you can complete the recap efficiently and effectively. A well-prepared workspace is half the battle won, allowing for focused and precise work, which is critical when dealing with delicate electronic components. The quality of your tools directly impacts the success and cleanliness of your solder joints.
Required Tools
- Soldering Iron: A temperature-controlled soldering iron with a fine tip is ideal.
- Solder: Thin, leaded solder (e.g., 60/40 tin/lead) is recommended for easier work.
- Desoldering Braid or Pump: Essential for removing old solder efficiently.
- Tweezers: Fine-tipped tweezers for handling small components.
- Flux Pen: Helps improve solder flow and clean joints.
- Isopropyl Alcohol (90%+): For cleaning the PCB after desoldering and before soldering.
- Cotton Swabs or Kimwipes: For applying alcohol and cleaning.
- Small Phillips Head Screwdriver: For disassembling the Game Gear case.
- Pry Tool (Plastic): To gently open the case without scratching.
Beyond the tools, selecting the correct ceramic capacitors is crucial. You'll need a capacitor kit specifically designed for the Sega Game Gear, ensuring you have all the necessary capacitance values and voltage ratings. These kits are readily available from various online retro gaming repair shops. Double-checking the values against a reliable Game Gear service manual or online resource can prevent errors. Always opt for capacitors with a voltage rating equal to or higher than the original, and ensure the capacitance matches precisely. The physical size of the ceramic capacitors should also be considered to ensure they fit properly on the board without causing interference.
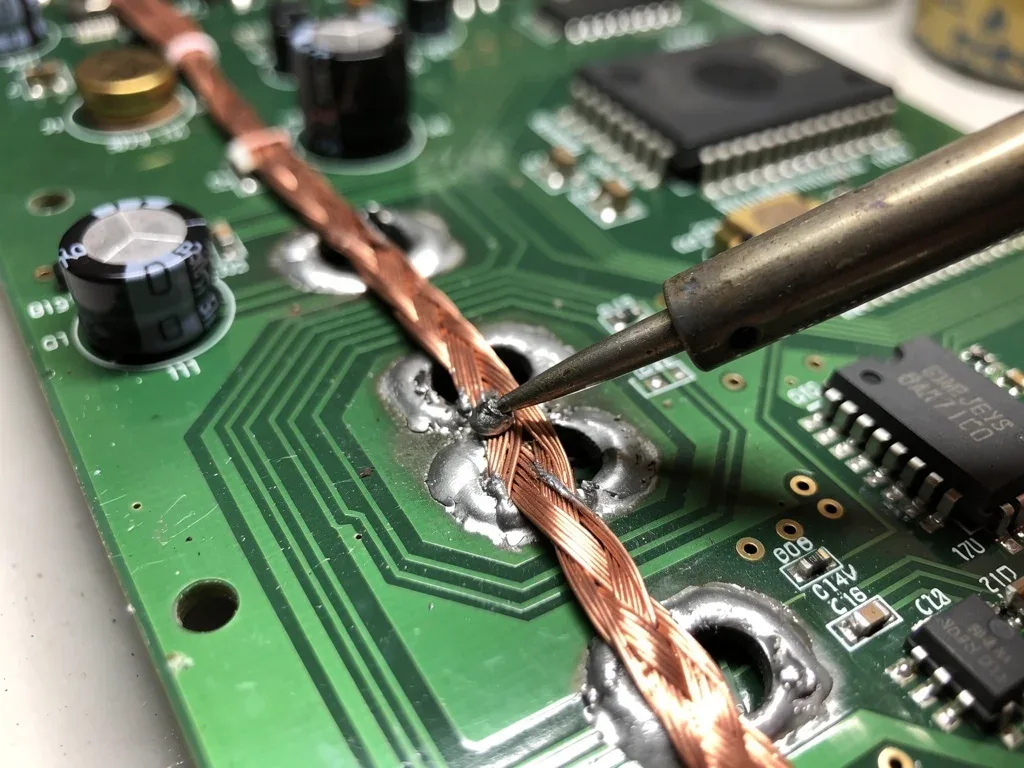
Investing in quality tools not only makes the job easier but also reduces the risk of damaging your console. Cheap tools can lead to cold solder joints, lifted pads, or even component overheating. A good soldering iron, for instance, maintains a consistent temperature, which is vital for clean desoldering and soldering. Proper preparation and the right equipment are the cornerstones of a successful and quick recap, turning what might seem like a daunting task into a straightforward and enjoyable project. Remember, patience and attention to detail are your best allies in this endeavor.
Disassembly and Preparation: Getting to the Core
The first crucial steps in recapping your Sega Game Gear involve careful disassembly and thorough preparation of the circuit board. Rushing this stage can lead to accidental damage, making the entire process more challenging or even impossible. Take your time, document your steps if necessary, and ensure you have a clean, static-free workspace. Understanding the internal layout of your Game Gear will prove invaluable during both disassembly and reassembly, preventing missteps and ensuring all components are accounted for.
Step-by-Step Disassembly
- Remove Battery Cover and Batteries: Always ensure the console is powered off and all power sources are disconnected.
- Remove Screws: Use a small Phillips head screwdriver to remove the screws from the back of the Game Gear case. Keep these screws organized.
- Gently Separate Case Halves: Use a plastic pry tool to carefully separate the front and back halves of the case. Be mindful of any ribbon cables connecting the two halves, especially the screen cable.
- Disconnect Ribbon Cables: Carefully disconnect the ribbon cables, usually by flipping up a small latch on the connector.
- Remove Main PCB: Once cables are disconnected, the main PCB can usually be lifted out. Note any other screws or clips holding it in place.
Once the main PCB is exposed, the real preparation begins. Visually inspect the board for any signs of capacitor leakage, corrosion, or other damage. Pay close attention to the areas around the existing electrolytic capacitors, as these are common spots for electrolyte residue. This residue can be corrosive and needs to be thoroughly cleaned before new components are installed. Use isopropyl alcohol and cotton swabs to carefully clean any affected areas. Proper cleaning ensures good adhesion of new solder and prevents future issues caused by lingering corrosive material.
This preparation phase is also an opportune moment to take reference photos of the board, especially noting the orientation of the existing capacitors. While ceramic capacitors are non-polarized, it's good practice to understand the original layout. These photos can serve as a valuable guide during the reassembly process, ensuring no components are missed or incorrectly placed. A clean board and a clear understanding of the component layout are foundational to a successful and quick recap, minimizing guesswork and potential errors. This meticulous approach saves time in the long run and guarantees a higher quality repair.
The Recapping Process: Desoldering and Soldering with Precision
With your Game Gear disassembled and the PCB prepped, the core task of desoldering the old capacitors and soldering in the new ceramic ones begins. This stage requires a steady hand, patience, and a precise technique to avoid damaging the delicate traces and pads on the circuit board. Remember the goal is not just to replace the components, but to do so cleanly and efficiently, ensuring reliable connections that will last. Working systematically, one component at a time, reduces the risk of errors and makes the process more manageable.
Desoldering Old Capacitors
Begin by heating the solder joint of an old capacitor with your soldering iron while simultaneously applying desoldering braid or using a desoldering pump to wick away the molten solder. Ensure all solder is removed from both pads of the capacitor. Once the solder is clear, gently twist or pull the capacitor to free it from the board. If it doesn't come off easily, reheat the pads and apply more desoldering action. Avoid applying excessive force, as this can lift pads or damage traces, which are significantly harder to repair than simply removing a stubborn capacitor. Repeat this process for all electrolytic capacitors on the board, cleaning the pads with isopropyl alcohol after each removal.
Soldering New Ceramic Capacitors
Unlike electrolytic capacitors, ceramic capacitors are non-polarized, meaning they can be installed in any orientation. Place a new ceramic capacitor into the cleaned pads. Apply a small amount of flux to the pads to aid solder flow. Heat the pad and the capacitor lead simultaneously with your soldering iron, then introduce a small amount of fresh solder to create a clean, shiny joint. Ensure the solder forms a strong connection without bridging to adjacent pads or components. Trim any excess lead length from the capacitor after soldering. Repeat for all replacement capacitors. Double-check each joint for cold solder, shorts, or insufficient solder, ensuring every connection is solid and reliable. This methodical approach minimizes the chance of needing to re-do work.
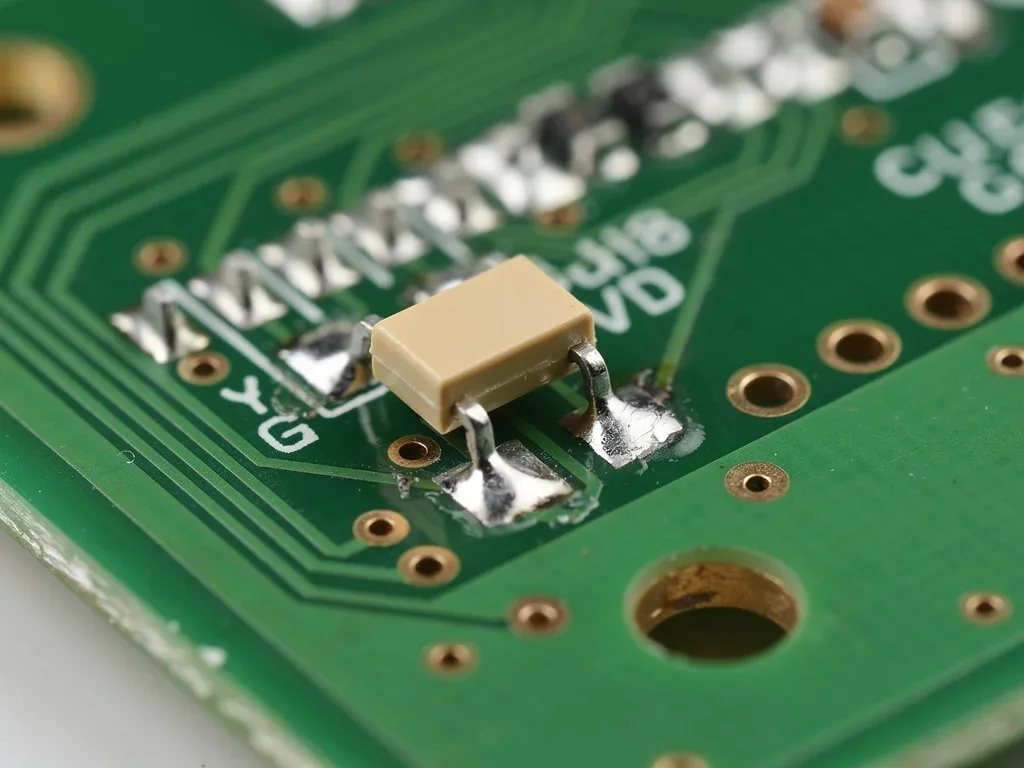
After all new capacitors are soldered in, give the entire board a final clean with isopropyl alcohol to remove any flux residue. This not only makes the board look professional but also prevents any potential conductivity issues from flux. A clean board is a happy board, and it signifies the completion of the most critical part of the recap. This attention to detail in both desoldering and soldering is what separates a quick fix from a long-lasting, high-quality repair. The time invested in precision here pays off in the console's revitalized performance.
Testing and Reassembly: Bringing Your Game Gear Back to Life
Once all the new ceramic capacitors are meticulously soldered onto the Sega Game Gear PCB, the next critical phase involves thorough testing and careful reassembly. This is where you confirm the success of your efforts and prepare your console for its triumphant return to gaming. Rushing the reassembly can undo all your careful work, so approach this stage with the same precision and patience used during the recapping process. A systematic reassembly ensures all connections are secure and components are correctly seated, preventing future malfunctions.
Initial Testing Before Full Reassembly
Before putting the entire console back together, it's advisable to perform a preliminary test. Connect the main PCB to the screen and power source (either batteries or an AC adapter). Power on the Game Gear and observe the screen and listen for audio. Look for a clear, bright display and listen for crisp, static-free sound. If there are any issues, such as a blank screen, distorted audio, or no power, immediately power off the console and visually inspect your solder joints for shorts, cold solder, or missed connections. This early testing can save you the hassle of disassembling the console again later. Pay particular attention to the power board capacitors, as these often cause no-power issues.
Careful Reassembly
- Reconnect Ribbon Cables: Carefully reattach all ribbon cables, ensuring they are properly seated and latched.
- Position PCB: Place the main PCB back into the front half of the case, securing any screws or clips.
- Align Case Halves: Gently bring the front and back case halves together, ensuring all buttons, the D-pad, and the screen are correctly aligned. Avoid forcing the case together.
- Reinsert Screws: Replace all the external screws, tightening them just enough to secure the case without over-tightening, which can strip the plastic.
- Insert Batteries/Connect Power: Once fully reassembled, insert fresh batteries or connect the AC adapter.
After reassembly, perform a comprehensive test with a game cartridge. Play for a few minutes, checking for consistent video, clear audio, and responsive controls. Pay attention to any flickering, buzzing, or unexpected shutdowns. If everything appears to be working flawlessly, congratulations! You have successfully recapped your Sega Game Gear. The feeling of seeing a previously dead or ailing console spring back to life is incredibly satisfying. This final testing phase ensures that your hard work has paid off and your Game Gear is ready for many more hours of retro gaming enjoyment, now powered by reliable ceramic capacitors.
Troubleshooting Common Issues and Maintenance Tips
Even with the most careful recapping process, sometimes issues can arise. Knowing how to troubleshoot common problems and understanding basic maintenance tips can save you time and prevent frustration. The goal is to address any lingering issues efficiently and ensure the longevity of your newly restored Sega Game Gear. Many problems can be resolved with a systematic approach to diagnosis, preventing the need for a complete re-do of the recap.
Common Troubleshooting Scenarios
- No Power: Double-check the power board capacitors. Ensure all power connections are secure and that the battery terminals or AC adapter jack are clean.
- Dim/Flickering Screen: Re-inspect the capacitors on the main board, particularly those related to the display circuit. Check for cold solder joints or shorts. Ensure the screen ribbon cable is fully seated.
- No Audio/Distorted Audio: Focus on the audio board capacitors. Verify that all audio-related solder joints are solid and that there are no shorts. Clean the headphone jack.
- Buttons Not Responding: While not directly related to capacitors, this is a common issue. Clean the button contacts and the PCB pads with isopropyl alcohol. Check the condition of the rubber membranes.
- Game Freezes/Glitches: This could indicate a deeper issue, but sometimes can be related to unstable power delivery. Re-check all capacitor connections for stability.
When troubleshooting, always start with the simplest checks and work your way up to more complex diagnostics. A visual inspection under good lighting can often reveal cold solder joints, solder bridges, or misplaced components. Using a multimeter to check for continuity on critical traces or to verify capacitor values can also be invaluable. Never attempt repairs or troubleshooting with the console powered on, and always discharge any remaining power before handling components.
Maintenance Tips for Longevity
To ensure your recapped Game Gear continues to perform optimally, a few maintenance practices are recommended. Store your console in a clean, dry environment away from extreme temperatures and humidity. Avoid leaving batteries in the console for extended periods, as they can leak and cause corrosion. Periodically clean the cartridge slot with a cotton swab and isopropyl alcohol to ensure good contact with game cartridges. While ceramic capacitors are more robust, good general care will contribute significantly to the overall lifespan of your console. Regular, gentle cleaning of the exterior and careful handling will keep your revitalized Game Gear looking and playing its best for years to come.
| Key Point | Brief Description |
|---|---|
| Ceramic Capacitor Benefits | Offers extended lifespan, superior stability, and compact size compared to electrolytic capacitors. |
| Essential Tools | Requires soldering iron, desoldering braid, flux, isopropyl alcohol, and small screwdrivers. |
| Recapping Process | Involves careful disassembly, desoldering old components, and precise soldering of new ceramic capacitors. |
| Troubleshooting & Maintenance | Addresses common issues like no power or screen problems, and emphasizes proper storage and cleaning. |
Frequently Asked Questions About Game Gear Recapping
What are the main benefits of using ceramic capacitors for a Game Gear recap?▼Ceramic capacitors offer several key benefits, including a significantly longer lifespan due to their solid-state nature, improved stability across various temperatures, and a more compact size that simplifies installation. They effectively eliminate common issues like screen dimming and audio distortion.
Can a beginner successfully recap a Sega Game Gear?▼Yes, with patience, the right tools, and a steady hand, a beginner can successfully recap a Game Gear. It requires basic soldering skills, but numerous online guides and videos can walk you through each step. Practice on scrap electronics first if you're unsure.
What are the most common symptoms of failed Game Gear capacitors?▼Common symptoms include a very dim or completely black screen, distorted or no audio, and the console failing to power on at all. Sometimes, a console might power on but display garbled graphics or behave erratically. These are all signs of capacitor degradation.
Is it necessary to replace all capacitors, or just the visibly damaged ones?▼It is highly recommended to replace all electrolytic capacitors, not just those showing visible damage. Even if a capacitor appears fine, its internal electrolyte is likely degrading due to age, and it will eventually fail. A full recap ensures long-term reliability.
How long does a typical Game Gear recap take for an experienced individual?▼For an experienced individual with all the necessary tools and components readily available, a Sega Game Gear recap using ceramic capacitors can often be completed in under 45 minutes, including disassembly and reassembly. Beginners may take longer.
Conclusion
Recapping your Sega Game Gear with modern ceramic capacitors is a highly effective and rewarding endeavor that significantly extends the life and improves the performance of this classic handheld. By understanding the common failure points of original components, embracing the superior characteristics of ceramic replacements, and diligently following the steps for disassembly, desoldering, soldering, and reassembly, you can revitalize your console with confidence. This guide has provided a comprehensive roadmap to achieving a successful recap, often within a surprisingly short timeframe. Armed with the right tools, materials, and knowledge, you're now equipped to bring your beloved Game Gear back to its former glory, ensuring many more years of vibrant retro gaming. The satisfaction of restoring a piece of gaming history is unparalleled, and with modern components, that restoration is built to last.