Game Boy Color Speaker Repair: 10-Minute Micro-Soldering Guide
Advertisements
This guide offers a concise, 10-minute micro-soldering solution for the common Game Boy Color speaker failure, empowering retro gaming enthusiasts to restore their console's audio with practical, step-by-step instructions.
For many retro gaming enthusiasts, the iconic sounds of the Game Boy Color are as integral to the experience as the vibrant pixels on its screen. However, a common and frustrating issue that plagues these cherished handhelds is the dreaded speaker failure. If your beloved Game Boy Color has gone silent, fear not. This comprehensive guide on Fixing the Infamous Game Boy Color Speaker Failure: A 10-Minute Micro-Soldering Guide will walk you through the precise steps to restore its voice, often in less time than it takes to complete a level in your favorite game. We'll delve into the necessary tools, safety precautions, and the micro-soldering techniques required to bring your console back to life.
Understanding the Game Boy Color Speaker Issue
The Game Boy Color, a titan of handheld gaming, has a robust design, but like all electronics of its era, it's not immune to wear and tear. The speaker, a small but vital component, is particularly susceptible to failure. This section will explore the common reasons behind this silent affliction and how to accurately diagnose it, ensuring you're addressing the correct problem before diving into any repairs.
Speaker failure in the Game Boy Color can manifest in several ways, from complete silence to distorted or intermittent audio. Identifying the root cause is crucial for an effective repair. Often, the issue stems from degraded speaker components, corroded solder joints, or even physical damage due to drops or impacts. Understanding these potential culprits helps in preparing for the repair process.
Common Causes of Speaker Failure
Several factors contribute to the eventual demise of a Game Boy Color speaker. Age is a significant factor, as the delicate cone and voice coil can degrade over decades. Exposure to moisture or extreme temperatures can also accelerate this process, leading to internal damage. Additionally, the original solder connections, while robust for their time, can become brittle and crack, severing the electrical path to the speaker.
- Age-related degradation: The speaker's internal components, like the diaphragm and coil, naturally wear out over time.
- Corrosion: Moisture ingress can lead to corrosion on the speaker terminals or solder pads, impeding electrical flow.
- Physical damage: Drops or impacts can physically damage the speaker cone or break internal connections.
- Faulty solder joints: Cold or cracked solder joints can prevent the speaker from receiving an audio signal.
Diagnosing the problem correctly is the first step towards a successful repair. Before assuming a speaker replacement is necessary, it's wise to check for simpler issues. Sometimes, the volume potentiometer might be dirty or faulty, or there could be an issue with the headphone jack, which mutes the speaker when a plug is inserted. A visual inspection for obvious damage and testing with headphones can help narrow down the possibilities.
Ultimately, a silent Game Boy Color often points directly to a defunct speaker. Once you've ruled out other potential causes, you can proceed with confidence, knowing that a new speaker and a bit of micro-soldering will likely restore the beloved audio experience. This initial diagnostic phase is critical for efficient and effective troubleshooting, saving time and potential frustration.
Essential Tools and Safety Precautions
Before embarking on any micro-soldering project, especially one involving a vintage console, it's paramount to gather the right tools and adhere to strict safety protocols. This section outlines the essential equipment you'll need and emphasizes the safety measures to protect both yourself and your Game Boy Color during the repair process. Proper preparation is key to a smooth and successful operation.
Micro-soldering requires precision and a steady hand, so having the correct tools for the job is non-negotiable. Using inadequate equipment can lead to frustration, damage to the console, or even personal injury. Investing in quality tools will not only make the task easier but also increase the likelihood of a successful repair, ensuring your Game Boy Color speaker repair is done right.
Required Tools for the Repair
A well-equipped workspace is fundamental for any electronics repair. For this specific task, you'll need a fine-tipped soldering iron, ideally with temperature control, to prevent overheating delicate components. Good quality solder, preferably lead-free for health and environmental reasons, and flux will ensure strong, reliable connections. Desoldering braid or a desoldering pump will be indispensable for removing the old speaker.
- Fine-tipped soldering iron: Essential for precise work on small components.
- Quality solder and flux: To create strong, clean electrical connections.
- Desoldering braid/pump: For efficient removal of old solder.
- Small Phillips head screwdriver: To open the Game Boy Color casing.
- Tweezers: For handling the tiny speaker and wires.
- Multimeter: (Optional but recommended) For checking continuity and diagnosing issues.
- Replacement speaker: Ensure it's specifically for the Game Boy Color or a compatible equivalent.
Safety should always be your top priority. Working with a soldering iron involves high temperatures, so proper ventilation is crucial to avoid inhaling fumes. Always wear safety glasses to protect your eyes from stray solder splashes. A heat-resistant mat will protect your workbench, and having a fire extinguisher nearby is always a sensible precaution. Never work on a powered-on device.
By assembling these tools and committing to these safety precautions, you create an optimal environment for Fixing the Infamous Game Boy Color Speaker Failure: A 10-Minute Micro-Soldering Guide. This meticulous approach minimizes risks and maximizes your chances of a flawless repair, allowing you to focus on the task at hand with confidence and peace of mind.
Disassembly and Speaker Removal
With your tools at the ready and safety measures in place, the next step is to carefully disassemble your Game Boy Color and remove the faulty speaker. This stage requires patience and a gentle touch to avoid damaging the console's delicate internal components. We'll guide you through each step, ensuring a smooth process from opening the casing to detaching the old speaker.
The Game Boy Color's design is relatively straightforward, but rushing the disassembly can lead to stripped screws, broken plastic tabs, or damaged ribbon cables. Take your time, document your steps if necessary, and keep track of all screws. This methodical approach is vital for any console repair, especially when dealing with vintage hardware.
Step-by-Step Disassembly
Begin by placing your Game Boy Color face down on a soft, clean surface to prevent scratching the screen. Use a small Phillips head screwdriver to remove the six screws located on the back of the console. Once the screws are out, carefully separate the front and back shells. Be mindful of the ribbon cable connecting the two halves, as it's easily damaged. Gently disconnect this cable.
- Remove back screws: Use a Phillips head screwdriver to unscrew the six screws on the back of the console.
- Separate casing: Carefully pry apart the front and back shells, being cautious of the ribbon cable.
- Disconnect ribbon cable: Gently unlatch and pull the ribbon cable connecting the two halves.
- Locate the speaker: The speaker is typically situated in the upper-left corner of the main PCB.
Once the console is open, you'll see the main circuit board (PCB) and the speaker, usually nestled in a small housing. The speaker is connected to the PCB by two small wires, which are soldered to specific pads. Before desoldering, take a clear picture of these connections for reference. This visual aid will be invaluable when soldering the new speaker, ensuring correct polarity.
Now, it's time to remove the old speaker. Heat your soldering iron and apply a small amount of flux to the solder joints of the speaker wires. Then, carefully touch the soldering iron to each joint while simultaneously using desoldering braid or a desoldering pump to remove the old solder. Once the solder is melted and removed, gently lift the wires from the pads and remove the speaker. This careful process is key to Fixing the Infamous Game Boy Color Speaker Failure: A 10-Minute Micro-Soldering Guide without causing further damage.
Preparing the New Speaker for Installation
With the old, defunct speaker successfully removed, the focus shifts to preparing the replacement for installation. This phase is just as critical as the removal process, as proper preparation ensures a clean, reliable connection and optimal audio performance. We'll cover how to inspect your new speaker, tin its wires, and ready the PCB pads for soldering, setting the stage for a seamless integration.
A new speaker, even if it's a direct replacement, needs a bit of attention before being soldered into place. Ensuring the wires are correctly tinned and the PCB pads are clean will make the soldering process much easier and more effective. Skipping these preparatory steps can lead to frustrating issues like cold solder joints or intermittent sound, undermining your repair efforts.
New Speaker Preparation Steps
First, carefully inspect your new Game Boy Color speaker. Ensure there are no visible defects or damage to the cone or terminals. If the speaker comes with pre-tinned wires, you can skip the tinning step. However, if the wires are bare or have a protective coating, you'll need to tin them. Tinning involves applying a thin layer of solder to the wire ends, which helps them bond more effectively to the PCB pads.
- Inspect the new speaker: Check for any physical damage or manufacturing defects.
- Tin the speaker wires: Apply a small amount of solder to the ends of the speaker wires for better conductivity.
- Clean PCB pads: Use isopropyl alcohol and a cotton swab to clean any residual flux or solder from the PCB pads.
- Pre-tin PCB pads: Apply a tiny amount of fresh solder to the PCB pads where the speaker wires will connect.
Next, turn your attention to the Game Boy Color's PCB. The pads where the old speaker wires were connected need to be clean and free of any residual solder or flux. Use isopropyl alcohol and a cotton swab to thoroughly clean these areas. This ensures a pristine surface for the new solder connections. If necessary, use your desoldering braid to wick away any excess solder, leaving flat, clean pads.
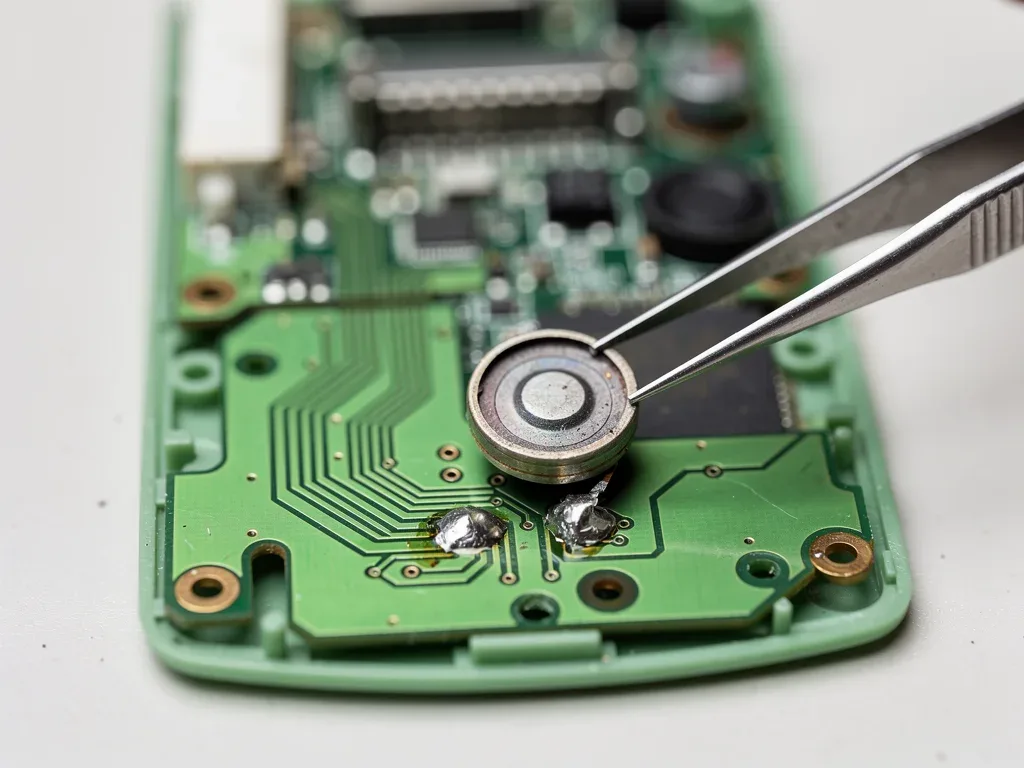
Finally, apply a tiny amount of fresh solder to the now-clean PCB pads. This process, known as pre-tinning the pads, creates a small bead of solder that will readily accept the tinned speaker wires, making the final soldering step much quicker and more reliable. With the speaker and PCB pads meticulously prepared, you're now ready for the critical micro-soldering phase of Fixing the Infamous Game Boy Color Speaker Failure: A 10-Minute Micro-Soldering Guide.
The Micro-Soldering Process: Attaching the New Speaker
This is where the magic happens: carefully soldering the new speaker onto the Game Boy Color's PCB. This step requires a steady hand, good lighting, and a focus on creating strong, clean solder joints. Follow these instructions precisely to ensure your new speaker is securely connected and ready to deliver crisp, clear audio once more.
Micro-soldering small components like a speaker involves delicate work. The goal is to make quick, efficient solder connections without overheating the speaker or the PCB. Remember the reference photo you took earlier of the old speaker's connections; it will be invaluable for ensuring correct polarity. Incorrect polarity might result in no sound or distorted audio.
Soldering Techniques for Success
With your soldering iron heated to the appropriate temperature and the new speaker's tinned wires and pre-tinned PCB pads ready, position the speaker in its housing. Using tweezers, carefully align one of the speaker wires with its corresponding PCB pad. Touch the hot soldering iron tip to both the tinned wire and the pre-tinned pad simultaneously.
- Align speaker wires: Use tweezers to carefully position the tinned speaker wires onto their respective PCB pads.
- Apply heat and solder: Touch the soldering iron to both the wire and the pad simultaneously, allowing the solder to flow.
- Ensure good flow: The solder should melt and flow smoothly, creating a shiny, conical joint.
- Repeat for the second wire: Solder the second speaker wire to its pad, ensuring polarity is correct.
- Inspect joints: Visually check for cold joints (dull, lumpy) or solder bridges.
The solder from the pad and the wire should melt and flow together, creating a shiny, conical joint. Avoid holding the iron on for too long, as excessive heat can damage the speaker or lift the copper traces on the PCB. A good solder joint should be smooth and shiny, not dull or lumpy (a sign of a cold joint). Once the first wire is secure, repeat the process for the second wire, paying close attention to polarity.
After both wires are soldered, gently tug on them with your tweezers to ensure they are firmly attached. Visually inspect the solder joints under magnification if possible, checking for any solder bridges (where solder inadvertently connects two pads) or cold joints. If everything looks good, you've successfully completed the micro-soldering phase of Fixing the Infamous Game Boy Color Speaker Failure: A 10-Minute Micro-Soldering Guide. This precision work is crucial for restoring the console's full functionality.
Reassembly, Testing, and Troubleshooting
Once the new speaker is securely soldered, the final steps involve carefully reassembling your Game Boy Color, testing its audio functionality, and knowing how to troubleshoot any issues that might arise. This section will guide you through putting your console back together and ensuring your hard work has paid off, bringing sound back to your retro gaming sessions.
Reassembly is essentially the reverse of disassembly, but just as with the initial breakdown, it requires care and attention to detail. Rushing this stage can undo all your precise soldering work or lead to new problems. Taking your time ensures all components are correctly seated and connected, safeguarding your repair.
Reassembly and Initial Testing
Start by reconnecting the ribbon cable that links the two halves of the Game Boy Color casing. Ensure it's properly seated and latched. Then, carefully align the front and back shells, making sure no wires are pinched and all internal components are in their correct positions. Once aligned, reinsert the six Phillips head screws into the back of the console, tightening them gently to avoid stripping the plastic posts.
- Reconnect ribbon cable: Securely reattach the main ribbon cable between the two halves.
- Align casing: Carefully fit the front and back shells together, checking for pinched wires.
- Reinsert screws: Fasten the six back screws, hand-tightening them to prevent over-tightening.
- Initial power-on: Insert batteries and a game cartridge, then power on the console.
- Test audio: Listen for sound from the speaker during gameplay or the startup chime.
With the console reassembled, it's time for the moment of truth: testing. Insert some fresh AA batteries and a Game Boy Color cartridge. Power on the device and listen carefully. You should hear the familiar Nintendo chime and, once a game loads, the in-game audio. Try adjusting the volume wheel to confirm full functionality. If you hear clear, consistent sound, congratulations—you've successfully completed the repair!
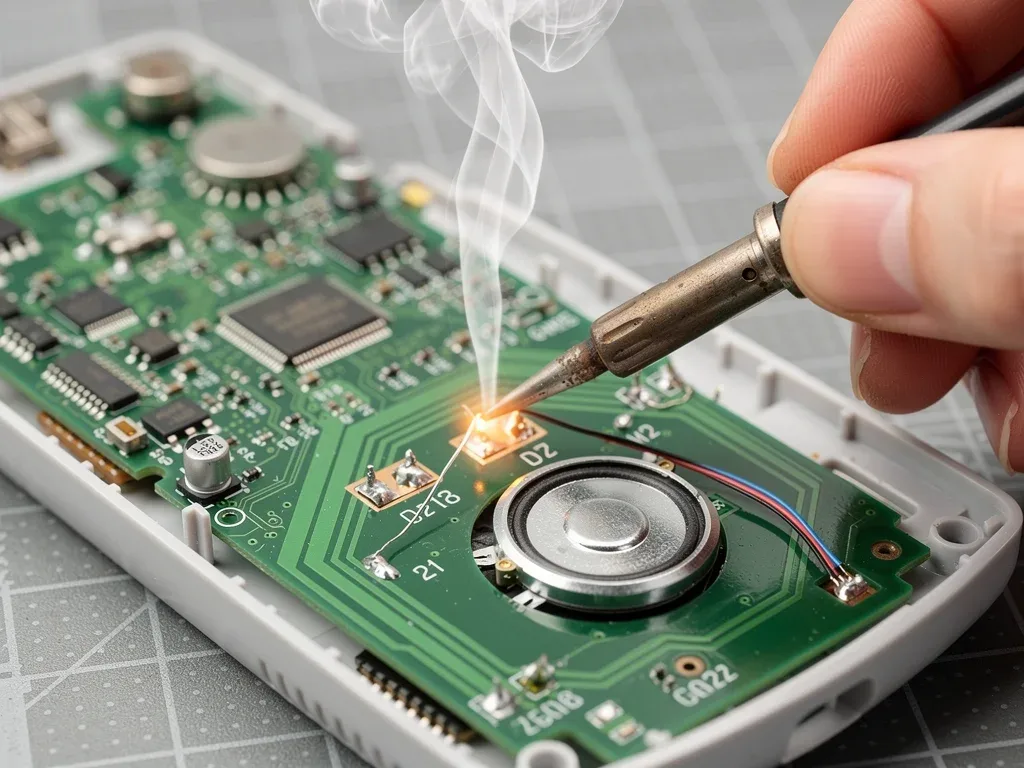
However, if you encounter no sound, distorted audio, or intermittent issues, don't despair. Troubleshooting is a normal part of electronics repair. The most common problems include cold solder joints, incorrect speaker polarity, or a faulty replacement speaker. Re-open the console and re-inspect your solder joints for any dullness or poor connections. Use a multimeter to check for continuity between the speaker terminals and the PCB pads. If the polarity is reversed, you'll need to desolder and re-solder the wires. This systematic approach to troubleshooting ensures that your efforts in Fixing the Infamous Game Boy Color Speaker Failure: A 10-Minute Micro-Soldering Guide ultimately succeed.
Maintaining Your Game Boy Color's Audio
Once you've successfully revived your Game Boy Color's audio, it's natural to want to keep it in prime condition for years to come. This section provides practical tips and best practices for maintaining your console's speaker and overall functionality. Proactive care can significantly extend the life of your repair and prevent future audio issues, ensuring continuous retro gaming enjoyment.
Just as with any vintage electronic device, regular maintenance and careful handling are key to longevity. The speaker, being a delicate component, benefits greatly from preventative measures. Understanding how to protect it from common hazards will save you the trouble of future repairs and keep your Game Boy Color singing its classic tunes.
Tips for Long-Term Audio Health
One of the simplest yet most effective maintenance tips is to keep your Game Boy Color clean. Dust and debris can accumulate in the speaker grille, potentially muffling sound or even causing internal damage over time. Use a soft brush or compressed air to gently clear out any obstructions. Avoid using liquids directly on the speaker, as moisture is a known enemy of electronics.
- Regular cleaning: Keep the speaker grille free of dust and debris using a soft brush or compressed air.
- Protect from moisture: Avoid exposing the console to humidity or direct liquid contact.
- Gentle handling: Prevent drops or impacts that could physically damage the speaker or internal connections.
- Proper storage: Store your Game Boy Color in a dry, temperate environment away from extreme conditions.
- Volume management: Avoid playing at maximum volume for extended periods, as this can strain the speaker.
Another crucial aspect of maintenance is protecting your console from physical shock. Drops and impacts can easily dislodge components, crack solder joints, or damage the speaker cone itself. Consider using a protective case when transporting your Game Boy Color. Storing it in a safe, stable place when not in use also goes a long way in preventing accidental damage.
Finally, be mindful of the environment in which you store and use your Game Boy Color. Extreme temperatures and high humidity can accelerate the degradation of electronic components, including the speaker. Store your console in a cool, dry place. By following these simple yet effective maintenance practices, you can ensure that your successful Fixing the Infamous Game Boy Color Speaker Failure: A 10-Minute Micro-Soldering Guide provides lasting enjoyment, keeping the retro sounds alive for many more years.
Advanced Considerations and Upgrades
While Fixing the Infamous Game Boy Color Speaker Failure: A 10-Minute Micro-Soldering Guide primarily focuses on repair, the world of retro gaming modification offers exciting avenues for enhancement. This section delves into advanced considerations, such as upgrading your speaker for improved audio quality or exploring alternative audio solutions. These options can elevate your Game Boy Color experience beyond its original capabilities.
For enthusiasts looking to push the boundaries of their retro console, merely restoring original functionality is just the beginning. Modern components often offer superior performance, and the Game Boy Color platform is ripe for audio enhancements. Exploring these upgrades can provide a richer, more immersive sound experience, breathing new life into classic titles.
Speaker Upgrades and Audio Mods
One popular upgrade involves replacing the stock speaker with a higher-quality, more powerful alternative. While the original speaker was adequate for its time, modern mini-speakers can offer greater clarity, a wider frequency response, and increased volume without distortion. When selecting an upgrade, ensure it fits within the console's limited space and operates at a compatible impedance.
- High-fidelity speaker replacement: Install a modern speaker with improved sound quality and volume.
- Class D amplifier integration: Add a small amplifier to boost audio output and efficiency.
- Custom audio output: Explore adding a line-out or even Bluetooth audio module for external sound.
- Capacitor replacement: Upgrade aging electrolytic capacitors on the audio circuit for cleaner power and sound.
Beyond just the speaker, other audio modifications can significantly enhance your Game Boy Color's sound. Integrating a small Class D amplifier, for instance, can provide a substantial boost in volume and clarity, making the audio more robust. These amplifiers are highly efficient and compact, often fitting within the console's shell without extensive modifications. This can be particularly appealing for those who enjoy playing without headphones.
For the truly adventurous, custom audio output options exist. This could involve adding a dedicated line-out jack for connecting to external speakers or headphones with higher fidelity, bypassing the internal audio circuit. Some modders even explore integrating tiny Bluetooth audio modules, allowing for wireless connection to modern audio devices. These advanced modifications require a deeper understanding of electronics and soldering but offer unparalleled customization. By considering these upgrades, your efforts in Fixing the Infamous Game Boy Color Speaker Failure: A 10-Minute Micro-Soldering Guide can be just the first step in creating a truly personalized and superior retro gaming machine.

| Key Point | Brief Description |
|---|---|
| Diagnosis & Tools | Identify speaker failure, gather fine-tipped soldering iron, solder, flux, and desoldering tools. |
| Disassembly & Removal | Carefully open console, disconnect ribbon cable, and desolder the old speaker from PCB. |
| Preparation & Soldering | Tin new speaker wires, clean/pre-tin PCB pads, then micro-solder the new speaker with precision. |
| Reassembly & Test | Reassemble console, power on, and test audio. Troubleshoot cold joints or incorrect polarity if needed. |
Frequently Asked Questions About Game Boy Color Speaker Repair
What are the most common signs of a Game Boy Color speaker failure?▼The most common signs include a complete absence of sound, distorted or crackling audio, or intermittent sound output. Sometimes, the volume control might seem unresponsive, or sound only works with headphones, indicating a specific speaker or audio jack issue.
Is micro-soldering difficult for a beginner, and what precautions should I take?▼Micro-soldering can be challenging for beginners due to the small components. Practice on scrap electronics first. Always wear safety glasses, work in a well-ventilated area to avoid fumes, and use a heat-resistant mat to protect your workspace from accidental burns.
Where can I find a reliable replacement speaker for my Game Boy Color?▼Reliable replacement speakers can be found on specialized retro gaming parts websites, electronic component suppliers, or reputable online marketplaces. Ensure the speaker is specifically designed for the Game Boy Color or is a compatible equivalent with the correct impedance and size.
What if I still have no sound after replacing the speaker?▼If there's still no sound, re-check your solder joints for cold connections (dull, lumpy solder) or solder bridges. Verify speaker polarity, ensure the ribbon cable is properly seated, and test the volume potentiometer. A multimeter can help check for continuity in the audio circuit.
Can I upgrade my Game Boy Color speaker for better sound quality?▼Yes, you can often upgrade the speaker to a modern, higher-fidelity alternative for improved sound quality and volume. Some enthusiasts also add small Class D amplifiers for a significant audio boost. Ensure any replacement fits physically and is electrically compatible with the console's audio circuit.
Conclusion
Fixing the Infamous Game Boy Color Speaker Failure: A 10-Minute Micro-Soldering Guide demonstrates that with the right tools, careful technique, and a bit of patience, restoring your cherished handheld console's audio is an achievable and rewarding endeavor. From understanding the common causes of speaker failure to the intricate steps of micro-soldering a new component, this guide has provided a comprehensive roadmap for any retro gaming enthusiast. The joy of hearing those classic chimes and game soundtracks once again is unparalleled, proving that these vintage devices, with a little TLC, can continue to deliver nostalgic experiences for years to come. Embrace the challenge, and bring your Game Boy Color back to its full, sonorous glory.